How is a coin design actually created?
In fact, even today, every design still begins where it has for centuries: in the creative mind of an artist who is grappling with a theme and desperately wondering how to capture such complex concepts as solar energy or 500 years of the Reformation in a coin design that is only a few centimeters in diameter.
The Design Phase
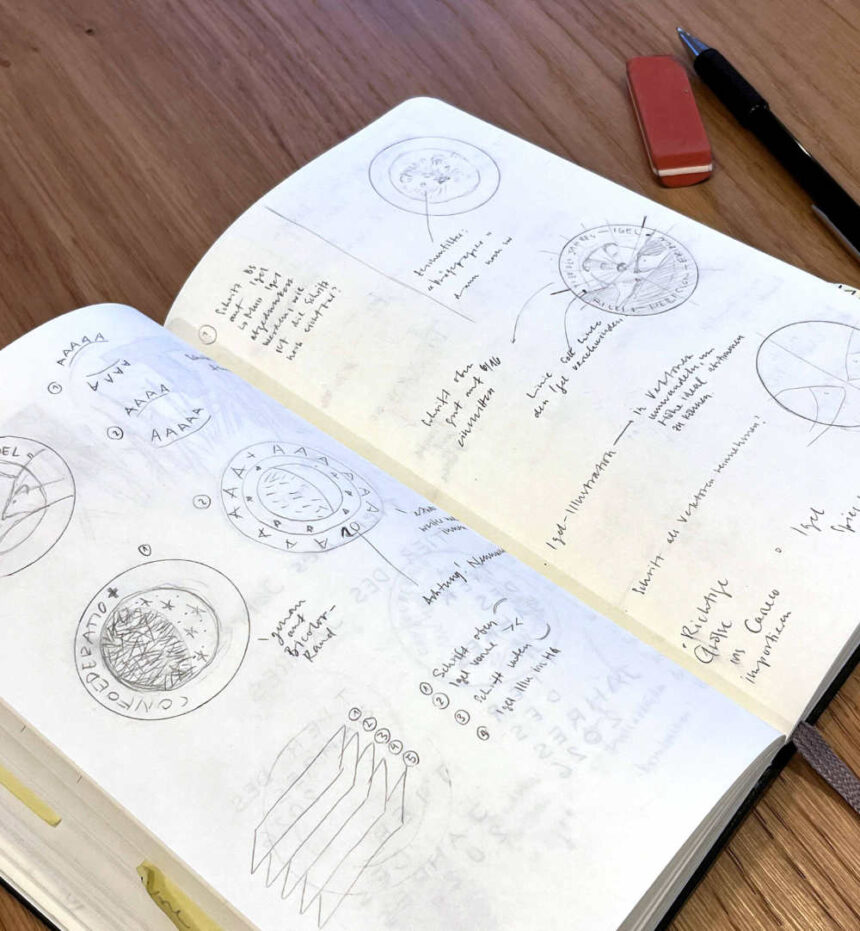
Once a theme has been selected (and we’ll discuss elsewhere who decides on the themes for commemorative coins today), Fabia Lyrenmann begins to brainstorm. She jots down whatever comes to mind, sketches out initial ideas, but she doesn’t stop there. Behind every single image lies extensive research on the theme and on every existing visual interpretation of the theme she can find.
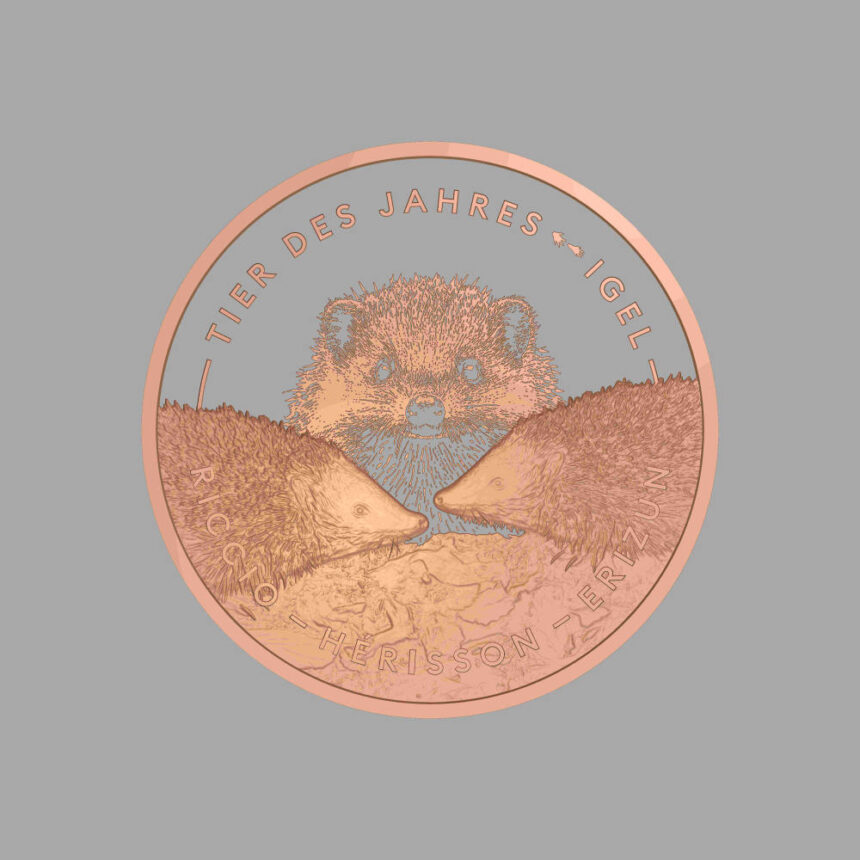
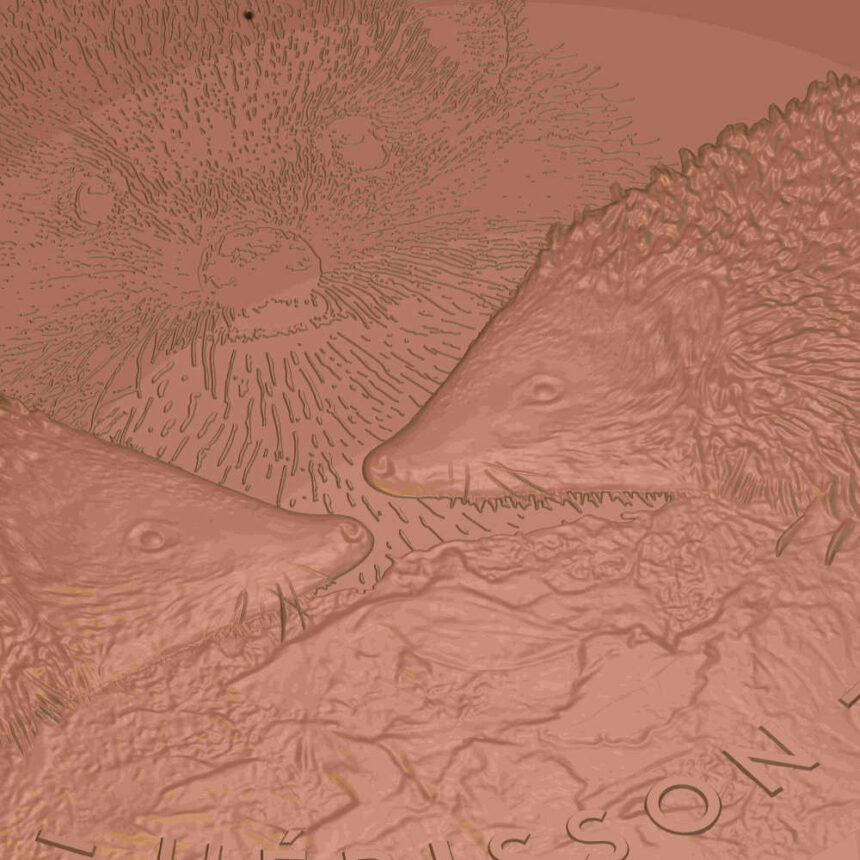
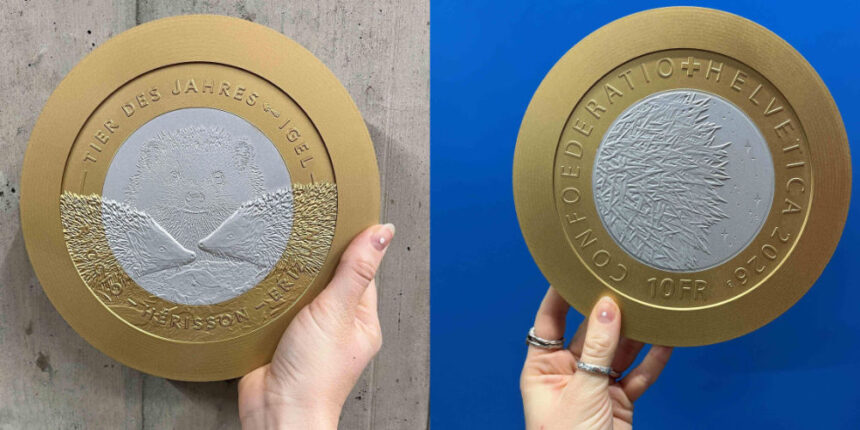
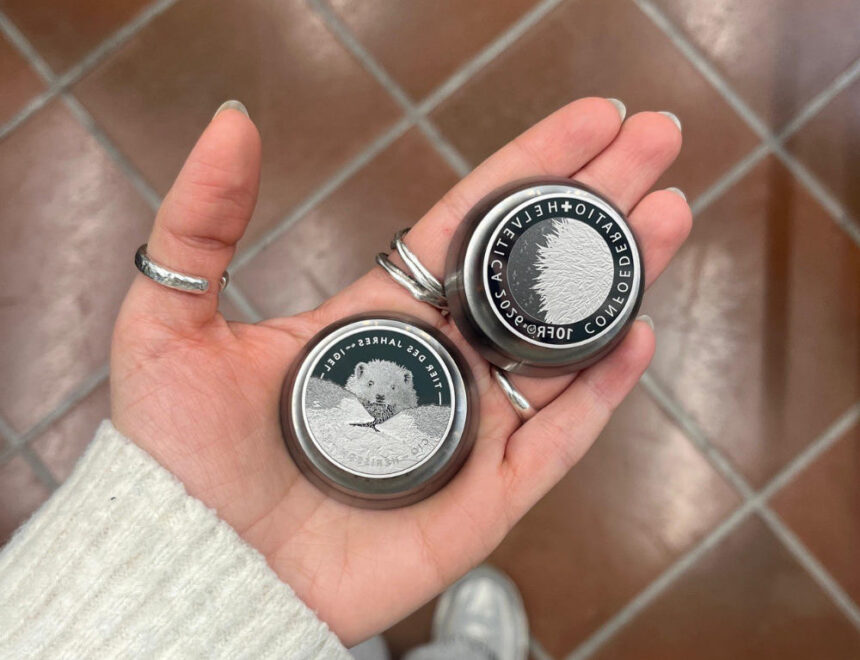
Fabia Lyrenmann explains: “Coins and medals on which the theme has already been designed are particularly useful to me in this phase. I examine them in detail. With their help, I understand where the sticking points lie. In other words, which elements are particularly important for capturing the theme. Take, for example, the hedgehog featured in the design of our 10-franc bimetallic coin ‘Animal of the Year: the Hedgehog.’ To capture a hedgehog realistically, the spines are key. And that is very, very difficult to achieve in relief without color printing.”
Once Ms. Lyrenmann has prepared herself visually and conceptually for the theme, she begins to think with her hand. She draws—including digitally. In doing so, she tests compositions by combining various image and text elements.
From the wealth of her drawings, she creates digital collages using Photoshop or InDesign, thereby mapping out the paths she has taken and the images these paths have led to. She needs this to present her ideas to the Swissmint team. Together, they then make a selection of two or three concepts, which Fabia Lyrenmann develops and prepares for technical implementation. From these final designs, the team chooses the “winner,” which becomes the model for the stamp.
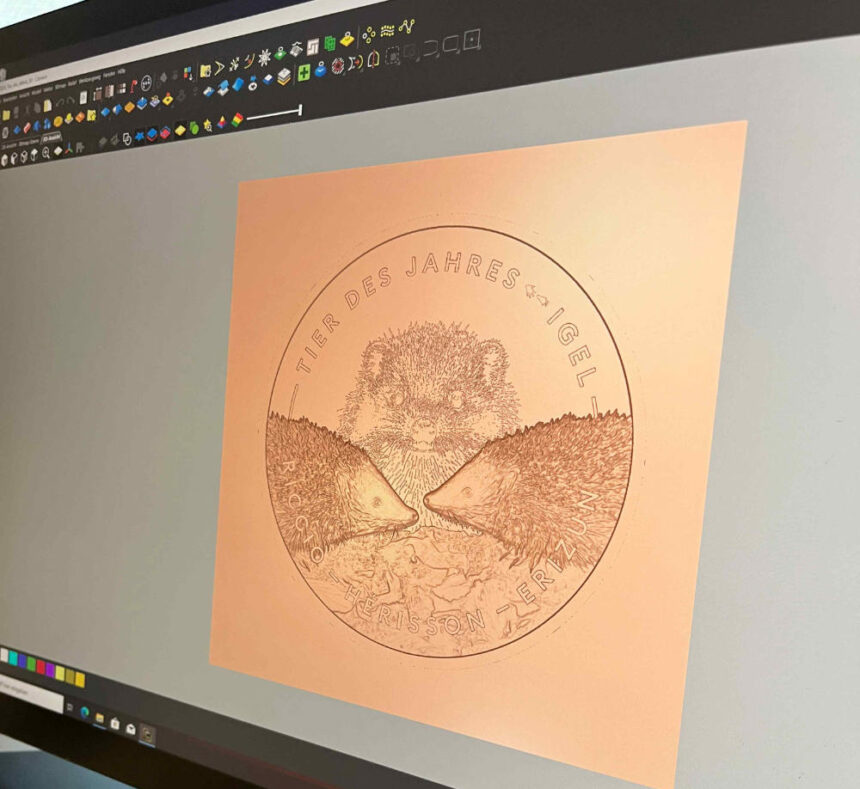
2D Digital Drawing Phase
In this phase, the drawing isn’t simply scanned. No, the design is completely rebuilt from scratch. Fabia Lyrenmann explains: “Every single element is redrawn digitally. There are two approaches to this today. I can paint an image with many shades of gray in Photoshop. In this process, the darker an element is, the lower it should be positioned. I like to use this method for organic elements like flowers or animals. I prefer to create graphic elements like the Swiss cross or the letters in the legends using vector graphics.”
While Photoshop works with pixels—tiny color squares filled with a specific tint—vector graphics describe an image as a kind of arrow containing a wealth of information, namely:
· Where does something begin?
· Where does something end?
· How does the line run in between (straight or curved)?
This creates shapes to which colors can be added in a subsequent step. Finally, everything is combined and composed. Imagine each vector as a Lego brick that must be added to fit perfectly with the others.
Ms. Lyrenmann also explains the advantage of vector graphics: “I can enlarge a vector graphic as much as I want without any loss of quality. That’s not the case with pixel-based graphics. They eventually become pixelated—and we’ve all seen that happen on our computer screens.”
Was that too complicated? Well, then just remember that in this phase, the coin design is drawn using a computer, and the relief is already taken into account. In addition, initial ideas for the matting are developed at this point.
3D Finalization Phase
Only then is the data imported into Carveco, a software program used worldwide. Carveco is a program that converts 2D into 3D and helps the designer refine their design. With just a few keystrokes, the user can modify details and ensure that these changes automatically result in all logical consequences. For example, details can be added, motifs enlarged or reduced, reliefs raised or lowered, or surfaces filled with a wide variety of content.
5:1 scale plastic model
When Fabia Lyrenmann thinks, “Now everything is perfect!”, she has a plastic model of her design made. To do this, she exports the dates stored in Carveco and sends them to her colleagues in toolmaking (in mints, the term “tool” is often used to refer to die stamps). They feed the dates into a CNC milling machine, which produces the model on a 5:1 scale.
The model is discussed once again in a large group meeting. If necessary, minor adjustments can be made at this stage.
Now is also the moment when, together with the technicians, the final decision is made regarding which areas of the design will feature matt finishes. And once that is decided, Fabia Lyrenmann receives written approval for her plastic model.
Data Preparation for Die Production
Finally, the relief data is exported and the die is milled. This completes Fabia Lyrenmann’s task. She is called in again for the test strike. After all, no one knows the design better than she does. She can confirm whether everything matches the design quite exactly. Once her opinion has been heard, the person in charge approves the test strike. And only then does the actual production process begin: the final dies used to produce the coins are manufactured.
We introduce Fabia Lyrenmann and her colleague Anouk Röthlisberger in a separate article.
Text by Ursula Kampmann